In this busy life, everyone wants to stay fit and healthy, but they don’t have the time to go for jogging or gym membership. Moreover, if you are one of those busy people, we have a simple and easy to perform the exercise called the “Surya Namaskar” or the sun salutation pose. In this article, we will try to learn to perform the Surya Namaskar exercise at the convenience of your home without visiting a yoga instructor. However, before we move towards the Surya namaskar steps, let’s pay attention to the benefits of Surya namaskar steps.
The Sun plays a vital role in our lives, and all energy available on the earth is from the Sun. Besides, the Surya Namaskar or the sun salutation technique has been in existence for centuries. Moreover, the Surya namaskar step expresses gratitude to our Sun for the energy it provides to all of us. Well, the Sun is our ultimate source of life, and this Yoga asana will not only help you to improve physical health, but it will also provide multiple benefits to your mental health.
Table of Contents
Benefits of the Surya namaskar steps
Surya namaskar can activate every part of your body, and it has a significant impact on the health of major organs of your body like the heart, lungs, kidney, and brain. Let’s look at the considerable benefits of Surya namaskar:
- It helps in improving muscle strength and overall endurance of our body.
- The exercise will help you to strengthen your upper body strength.
- Surya Namaskar improved the health of your heart if you do it every day.
- Surya Namaskar is also helpful in reviving the nervous system.
- If performed for a long duration, Surya namaskar will improve flexibility in men as well as women.
- It helps in improving the overall physical and mental well- being.
Surya Namaskar steps twelve steps of complete well being.
Step 1: Pranamasana
It is known as the praying pose, and it shows a profound gesture of greetings to the Sun.
- Stand on the yoga mat keeping your feet proportionate. Try to relax your body mass equally on the feet.
- Stretch your chest plus relax your shoulder
- Inhale and raise both arms. Exhale and bring your palm closer to the praying position facing your chest.
Step 2: Hastauttanasana
It is the raised arm pose.
- Stand straight and lift your arms, and also lookup.
- Expand your back while you stretch your spine
- Try to maintain proper balance when you are standing.
- In case you feel sluggish, don’t lookup.
Step 3: Padahastasana
It helps get rid of insomnia and osteoporosis.
- Curve forward and try to reach the toes with your hand. If you are unable to do this, no problem, at least try.
- Try to keep the spine straight when you are performing this pose.
- Press your heels gently so that the body mass spreads evenly.
Step 4: Ashwasanchalanasana
It is pretty helpful in improving lung power and in the strengthening of the spine.
- Inhale and curve your right leg to the back till you can
- Reach the surface using your left knee. Now, try to bend the knee at a right angle.
- Balance your weight on the toe.
Step 5: Chaturanga Dandasana
This is the best pose for people who face excess belly fat and who want to tone their abdomen.
- Place the left foot back and try to stay in the plank position. Concentrate on your shoulder, elbow, and wrist, and make sure that they are at a right angle to the ground.
- Straighten your back and bring your body in perfect balance.
Step 6: Ashtanganamaskara
It helps strengthen arms, shoulders, and legs.
- After you are in the plank position, drop the knees on the floor.
- Lower the chin down on the floor and land your shoulder right above your head.
- Keep your elbows joining your sides.
This position helps release the tension around your neck and shoulder.
Step 7: Bhujangasana
This is the snake pose, and it is the best pose if you want to get a fatless belly.
- Stretch down on the belly and reach your chin to the surface
- Keep the hands close by your body while the palm touches the ground.
- Slowly, try to stretch your arms and raise the chest.
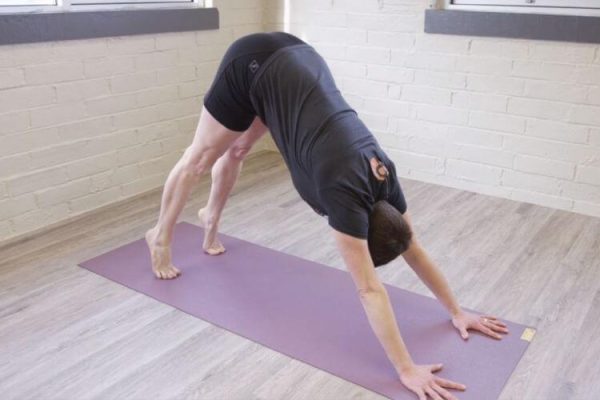
Step 8: Adho Mukha Svanasana
It is one of the essential Surya Namaskar steps that help enhance blood circulation and in relieving stress.
- Bend down on the heels and raise your hips. Now, put the tail bone towards the sky.
- Reach the floor with the palm to form a reverse V shape.
Step 9: Ashwa sanchalanasan
- Inhale and bring in your right foot between both your hands. Plus, bring the left knee towards the ground.
- Push the hips down and look at the sky.
Step 10: padahastasana
- Breathe-out slowly while bending down. Now, while placing the toes parallel to each other
- Reach the toes with the fingers
- Try to touch nose to your knees while gently exhaling.
Step 11: Uttana hastasana
- Raise the hands over and erect your spine
- Keep the palms on the floor.
- Look towards the sky when you are bending backward.
- Try to ensure that the biceps are behind your ears.
Step 12: Pranamasana
- Stand on the map and keep feet together.
- Distribute the mass on both feet
- Stretch the chest and relax the shoulders
- Inhale and raise your both the arms up
- Exhale while you bring both arms up
- Keep your palm in prayer position.
End this yoga position by lying down and relaxing your whole body. Moreover, Surya namaskar is a great exercise that will help you to stay happy and healthy. Therefore, follow all these Surya namaskar steps correctly if you want to achieve maximum benefits. Besides, yoga instructors worldwide are speaking about the innumerable benefits of Surya namaskar. If you’re going to get the best health benefits, try to include Surya Namaskar postures in your everyday exercise regime. The Surya namaskar postures may seem difficult initially, but you will learn it within a few weeks of practice.


